Are you new to MacBook or macOS? You are starting to use the MacBook for the first time, or you are familiar with Windows OS and switched to MacBook, here I’m telling some useful things that one could do, this will help you to get familiar with MacBook, make the Mac things user friendly, moreover makes you work efficiently. Here are the top 6 basic things for MacBook beginners,
- System Updates
- iCloud Drive Sync
- Path Bar and Status Bar
- Pick Right Theme
- Tap One Click
- Show Scrollbar Always
Let me share more details about each one below, I hope you would enjoy this article,
System Updates
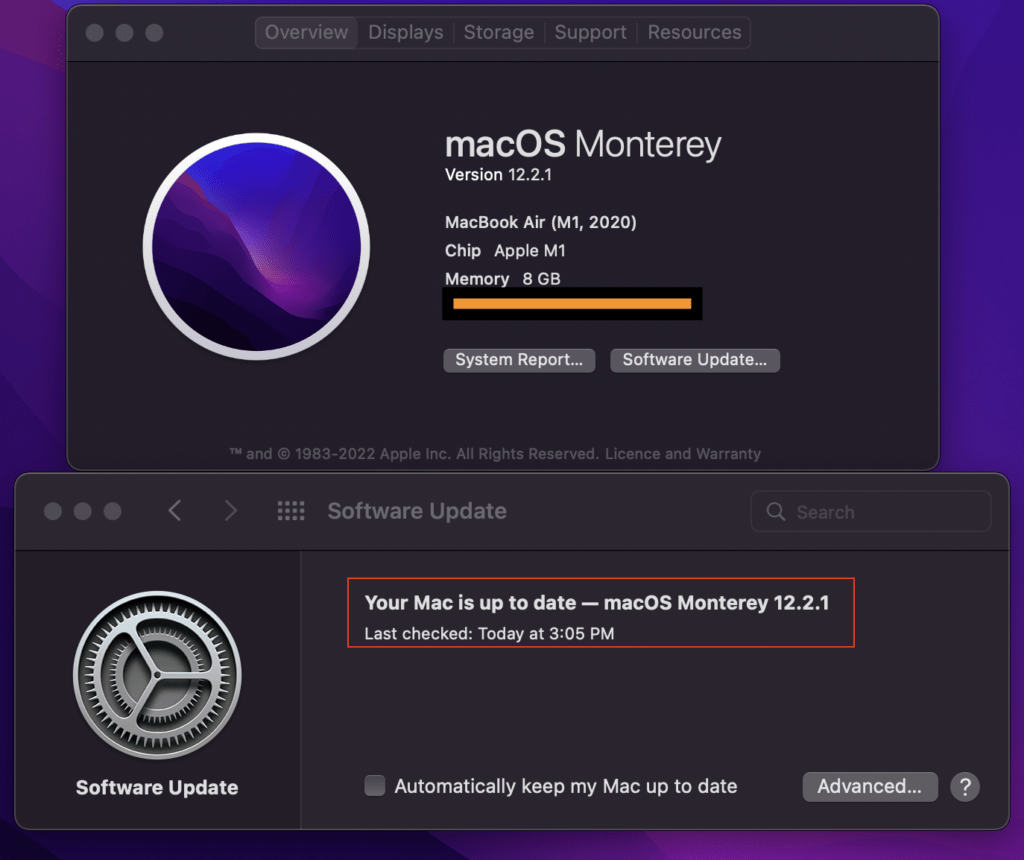
The first thing you check once you got your new Mac is the System Update. The MacBook should have OS installed up to date. We couldn’t say that the MacBook we bought newly should have come with macOS that was installed with all the recent security and patch updates.
To double-check this you have to go to System Updates and check whether any macOS updates are pending to install. If there any security patch updates are pending, install it as your first job.
To Navigate Software Update, go to menu Apple Icon -> About this Mac -> Software Update
iCloud Drive Sync
MacBook allows all the files, applications, and more to sync with iCloud automatically. MacBook offers 5GB of free cloud storage. We can manage the iCloud sync configurations to avoid large data files to sync with iCloud Drive automatically. Most of the time, we don’t want large data to be synced with iCloud, and we couldn’t access it when we are offline.
To manage iCloud Drive Sync,
Go to System Preferences -> Apple ID -> iCloud Drive -> Options
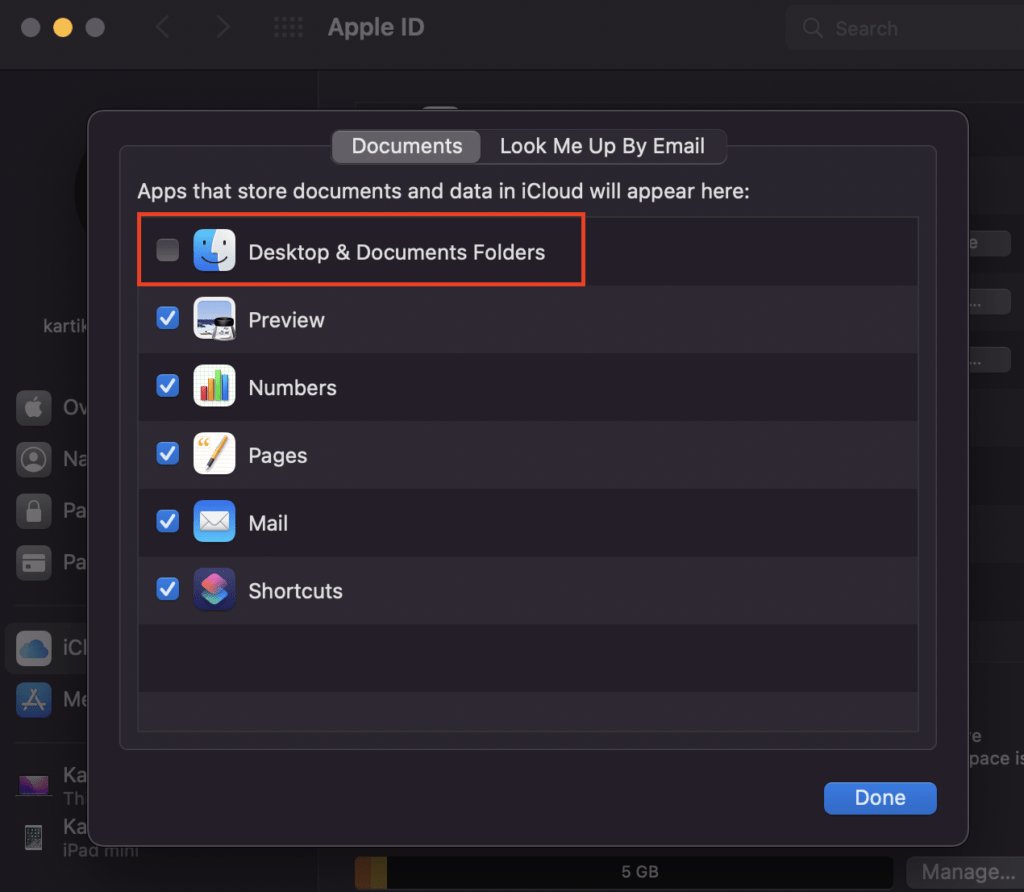
You will get the dialog the has iCloud Drive Option under the Documents tab. By default, the “Desktop & Documents Folders” has in a checked state.
You could uncheck the “Desktop & Documents Folders“, this will stop syncing all the files and folders to iCloud Drive automatically.
Path Bar and Status Bar
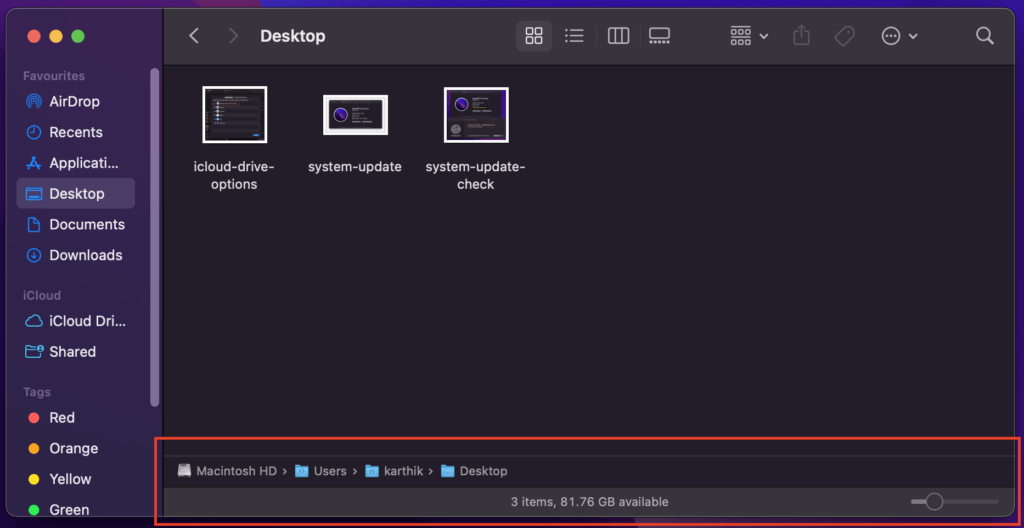
The Path Bar is useful to know the full path of files, images, videos that you located inside the opened folder in Finder.
As well Status Bar helps to know the available storage area in the location that opened in Finder.
By default, Path Bar and Status Bar are in a hidden state.
To Show Path Bar, Open the Finder -> View (Menu Bar) -> Show Path Bar
To Show Status Bar, Open the Finder -> View (Menu Bar) -> Show Status Bar
You can hide those bars anytime by following the same steps, and applying Hide Path Bar or Hide Status Bar respectively.
Pick Right Theme
The macOS offers two themes to pick the one that opts for your eyes and makes you feel comfortable. There are light and dark themes.
The light theme makes the appearance of menus, buttons, and windows light. Then the dark theme makes the appearance of menus, buttons, and windows dark. Also, you can pick the Auto theme, that will automatically adjust the light/dark throughout the day.
To update the theme, Go to System Preferences -> General -> Appearance
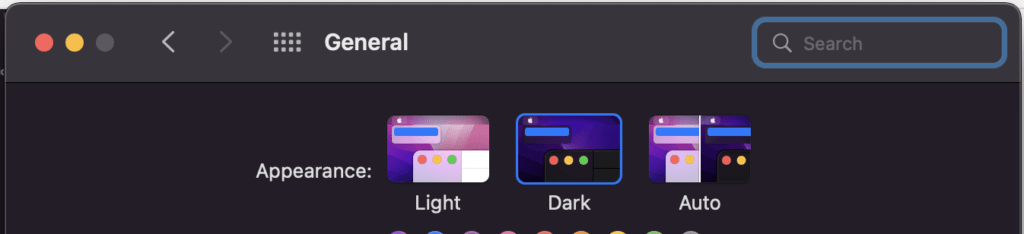
Pick either one from the available options Light, Dark, or Auto.
Tap One Click
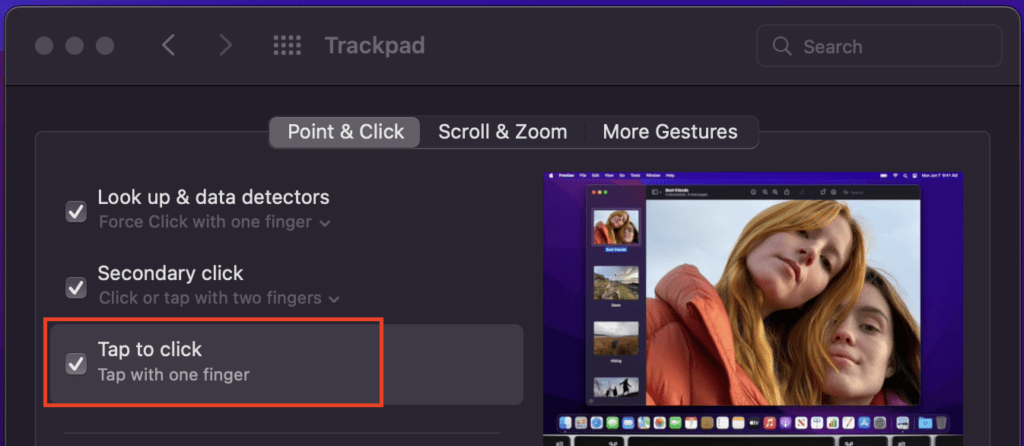
“Tap One Click” is a more effective option for those who prefer to use the trackpad often rather than the mouse. This gives the flexibility to open files, folders, images, applications, and all the left click actions in a single one-finger tap on the trackpad.
To set up this option, Go to System Preferences -> Trackpad -> Point and Click (Tab)
Show Scroll Bar Always
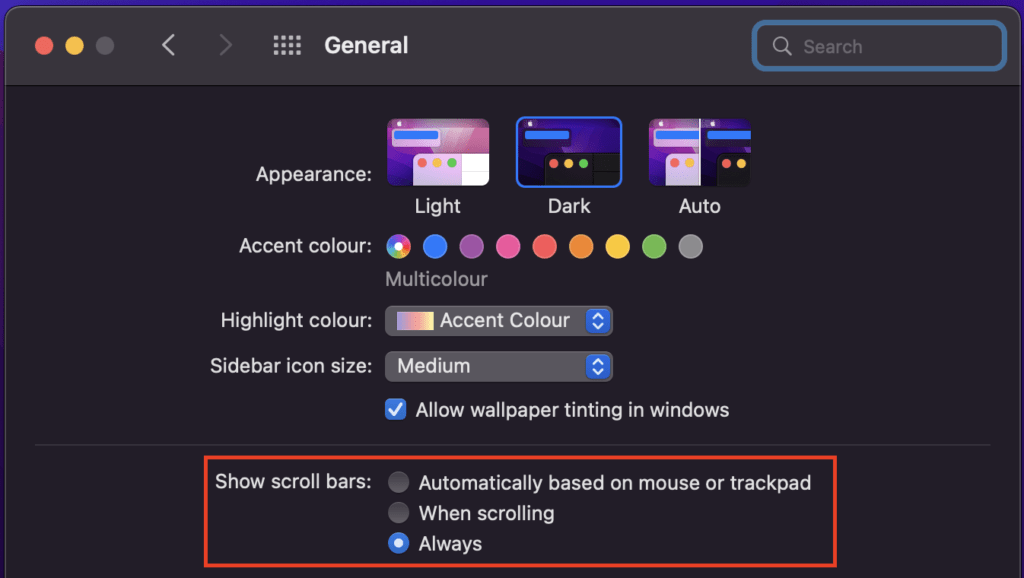
By default, macOS is not showing the scroll bar in the finder, browser, and other places where the scroll bar is required to navigate down. A scroll bar is only shown when we click on the area. This might be considered as optimizing the UI maximum space by hiding the scroll bar at the beginning. But as regular users, this behavior might frustrate us. So we have the option to always keep the scrollbar.
To set up this option, Go to System Preferences -> Trackpad -> Point and Click (Tab)
Conclusion
I hope this article helps MacBook beginners to set up their MacBook in some user-friendly ways and keep the system up to date with security updates. There are some other useful things other than this, the above-mentioned are the most common things for MacBook beginners. I will share some other useful things and tips about using the MacBook in my upcoming posts.


