Income Tax Department recently launched a new e-filing portal on June 7th, 2021. Most of the taxpayers experienced filing income tax returns on the older portal. Most of us might face some difficulties or inconveniences to use the new e-filing portal to file income tax returns that launched recently. In this article, I will walk through how to file income tax return on the new e-filing portal.
Where to find New E-filing Portal?
Go to the new e-filing portal using the below link, https://www.incometax.gov.in/iec/foportal/
The older portal link was
https://www.incometaxindiaefiling.gov.in/home
If you go older portal link, it will automatically redirected to new portal.

How to file income tax return?
Let’s come to the topic, how to file income tax returns on the new e-filing portal. I will walk through the steps one by one to complete the filing of income tax returns.
The steps I shared based on my own experience while filing income tax returns for this Assessment Year.
Let’s consider, you’re a salaried professional employee who has income from the salary or other secondary sources like house rent and you are doing some investments like the term, life insurance, LIC, health insurance, tax saving mutual funds (ELSS), Public Provident Fund (PPF), 5-Year FD, etc. Also, you might pay rent to your house owner. This article perfectly suits you to know how to file income tax returns.
Step 1: Login/Register with the new e-filing portal
The first step is you should log in to an e-filing portal to fill income tax return. So how do you log in?
If you are an existing account in the older portal, you can use the same login credentials, else you should create the new account.
To Login: https://eportal.incometax.gov.in/iec/foservices/#/login
To Register: https://eportal.incometax.gov.in/iec/foservices/#/register-home
PAN card number is a must to register. PAN card number will be used as a user id to log in.
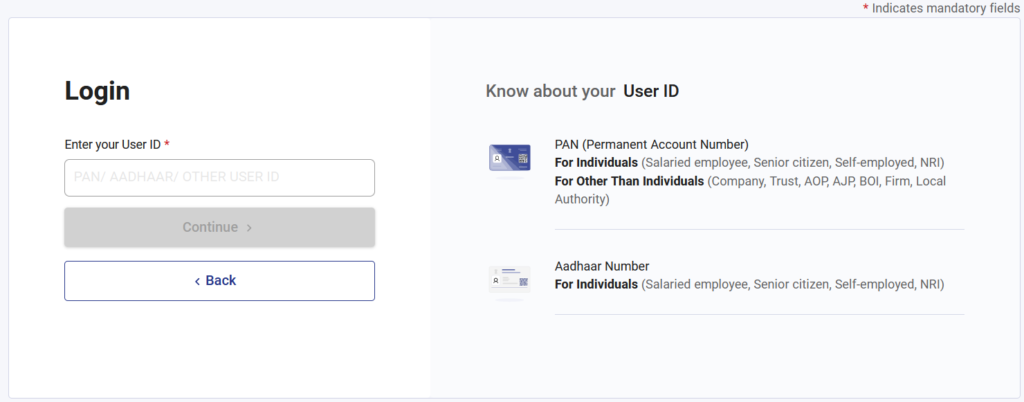
Login Page
Give input in User ID that will be your PAN number or AADHAR number then click the Continue button.
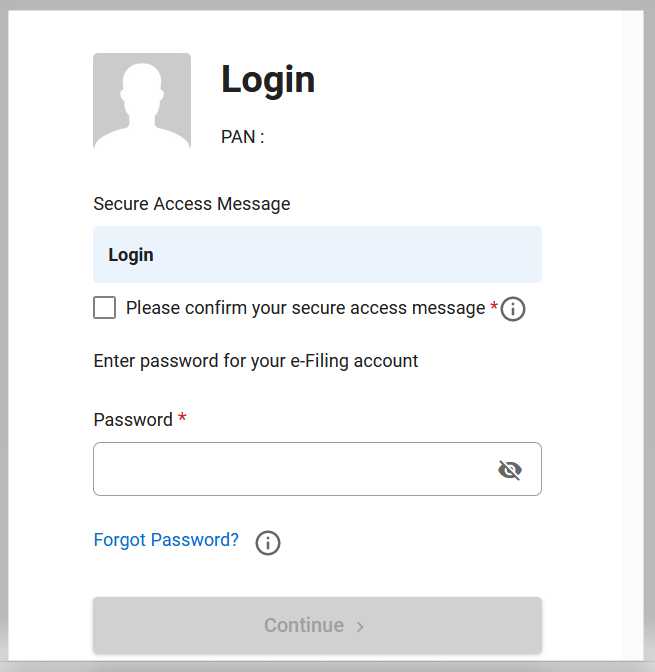
Secure Access Message
This is a new feature introduced in this portal. By default, “Login” has been set as our secure message.
This is our personalized secure access message which is proof of the fact that the website you have accessed is genuine.
We can update this message in our “Profile” post login. Hence, we must ensure this message always before proceeding with login.
- Tick the check box to confirm the secure access message.
- Enter the password.
- Proceed to Continue.
If you forget your password, use forget password link to set up the new password.
Password’s Maximum Length set to 14 Characters
The new e-filing portal restricted the password length up to 14 characters. So, you can’t enter passwords longer than 14 char.
As a normal user, I don’t see this as security improvements rather this will force us to use password length 14 or below. I believe the income tax department considers allowing a max length of at least up to 20 char, for security benefits.
So, if you previously had a password longer than 14, now you are not allowed to log in with your existing password, so you must reset the password using forget password option.
Now you have completed the login process successfully.
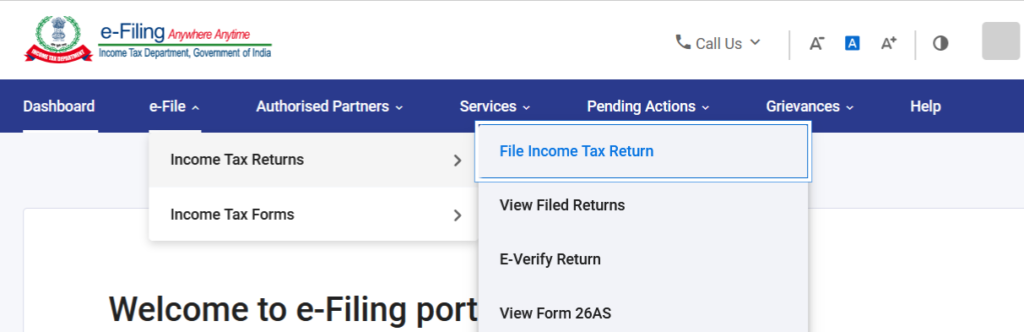
Step 2: Navigate to File Income Tax Return
After login, Go to menu e-File -> Income Tax Returns -> File Income Tax Return
https://eportal.incometax.gov.in/iec/foservices/#/dashboard/fileIncomeTaxReturn
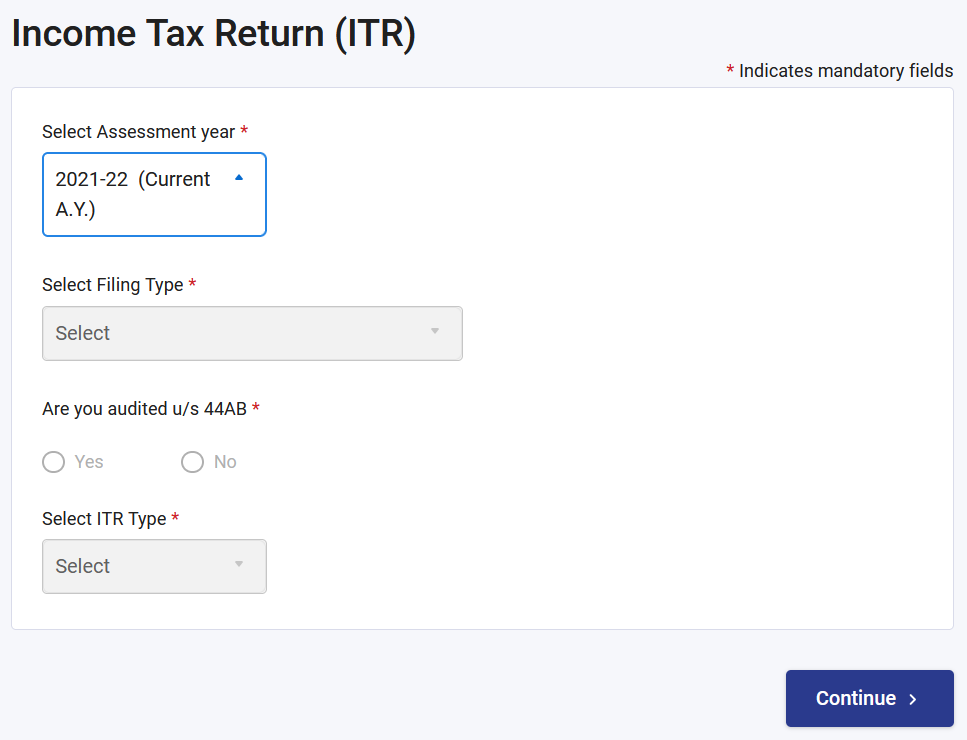
Step 3: Select Assessment Year
Select the right Assessment Year (AY) to file the income tax return.
The current Assessment Year 2021-22 will be selected if you want to file the Income Tax Return (ITR) for the income you earned in FY 2020-21.
What is the difference between Assessment Year and Financial Year?
Financial Year (FY) – The year you earn an income.
Assessment Year (AY) – This is the year when you assess/evaluate the earned income on the last financial year to file the income tax.
Let’s take an example, consider you have earned income from April 2020 to March 2021. So, this could be the Financial Year FY 2020-21. Then you evaluate or assess the income you earned on FY 2020-21 to file the income tax return in the current financial year April 2021 to March 2022. This will be the Assessment Year AY 2021-22.
So, last year’s income (FY 2020 -21) will be filed in the income tax return on the current year (AY 2021-22).
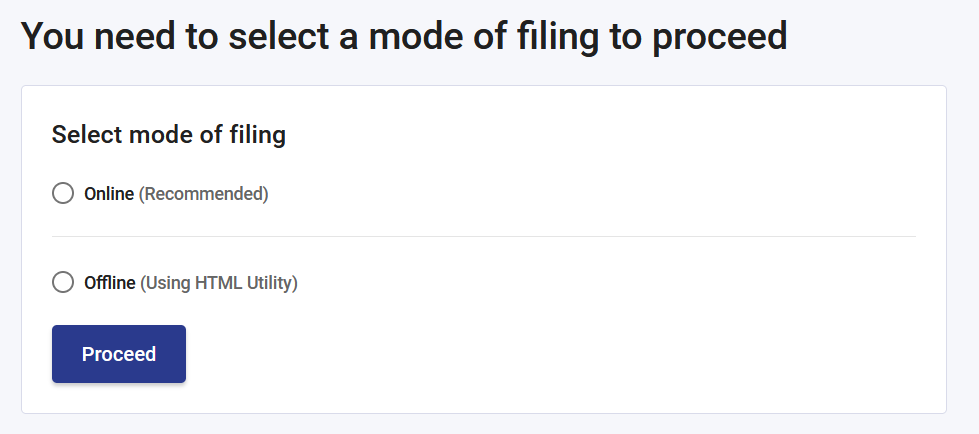
Step 4: ITR Filing mode
Decide the mode of filing here, Select Online (Recommended).
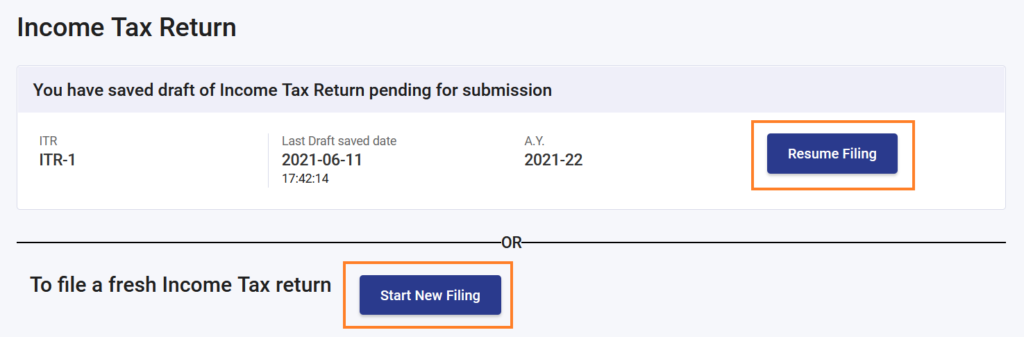
Step 5: Start New Filing
Here, you can start the do the new filing by click on the Start New Filing button.
If you already have a saved draft, you could use the Resume Filing button. This will help you to fill in the details partially and continue to proceed later on.
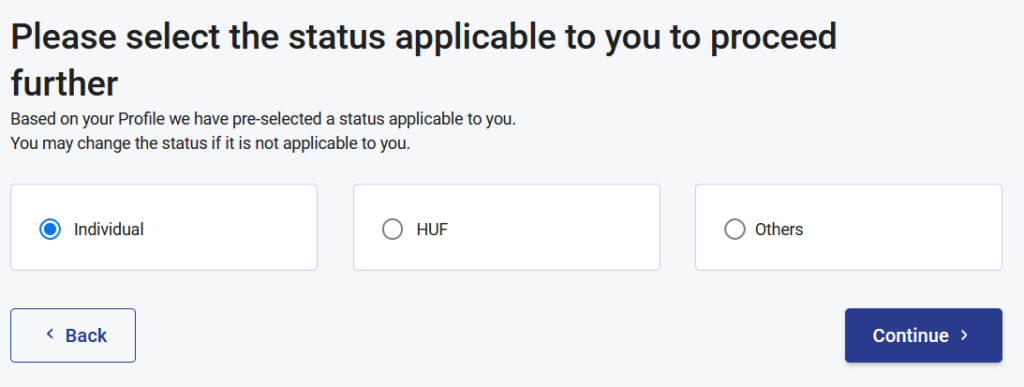
Step 6: Individual Status
Pick the status that applies to you. Select the Individual if you’re the Individual who is having a total income below 50laks INR.
HUFs mean Hindu Undivided Family, I’m not talking about HUF status here.
Step 7: ITR Forms
Here, you must select the ITR form – ITR 1 then click Proceed with ITR 1 button.
To know more about ITR forms, visits this article.

Step 8: Start to validate the returns
Get started to validate the returns by clicking Let’s Get Started button.

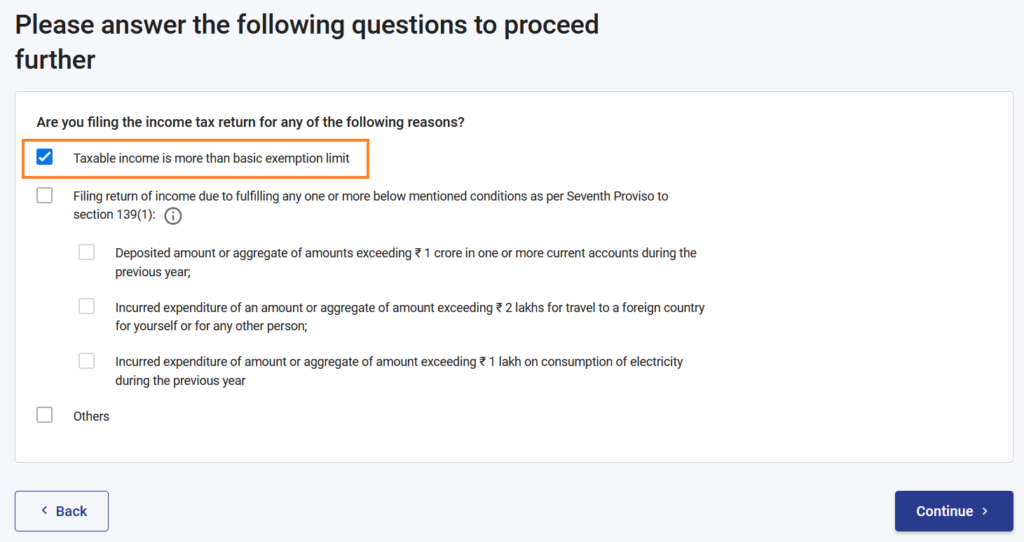
Step 9: Select the reason for filing income tax return
This would be the first option – Taxable income is more than the basic exemption limit that is more than 2.5laks per annum.
Select Continue.
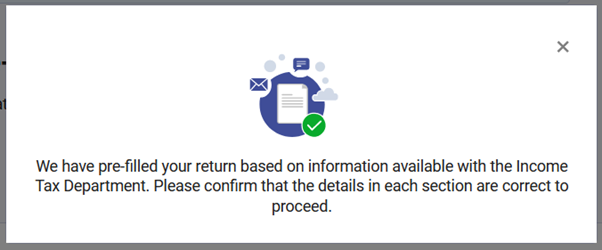
Once continued, you will see the notification, as it says the income tax department has pre-filled the incomes, tax paid, and deduction you submitted based on the data available with them.
Your returns will be pre-filled from Form 16. You can get Form 16 from your employer for each year.
Step 10: Confirm Return Summary
There is 5 section under Return Summary, you need to explore each section and confirm one by one individually. The 5 sections are,
- Personal Information] – Includes your Aadhaar, PAN, Contact, and Bank details (Return purpose)
- Gross Total Income – Includes your income from business, profession, salary, house property, income from other sources such as bank interest, etc.
- Total Deductions- Includes tax-saving deductions or payments towards life insurance, medical premium, pension funds, provident fund, ELSS, etc.
- Tax Paid – Includes details of taxes deducted and paid by your employer.
- Total Tax Liability – Tax amount you owe to the income tax department based on your income, deductions, and tax paid already.

Step 11: Verify the Personal Information
First you need to verify the personal information section in tax return summary.
The personal information section has following to verify,
- Profile information – Name, PAN. Aadhar number, Date of Birth.
- Contact – Address, Phone, Email.
- Nature of Employment – Select “Others” (if you’re the salaried private sector employee).
- Filing Section – Select Filed u/s 139(1) (if you are filing a return on or before the due date).
- New Tax Regime – Select Yes/No – if you are opting for a new Tax Regime.
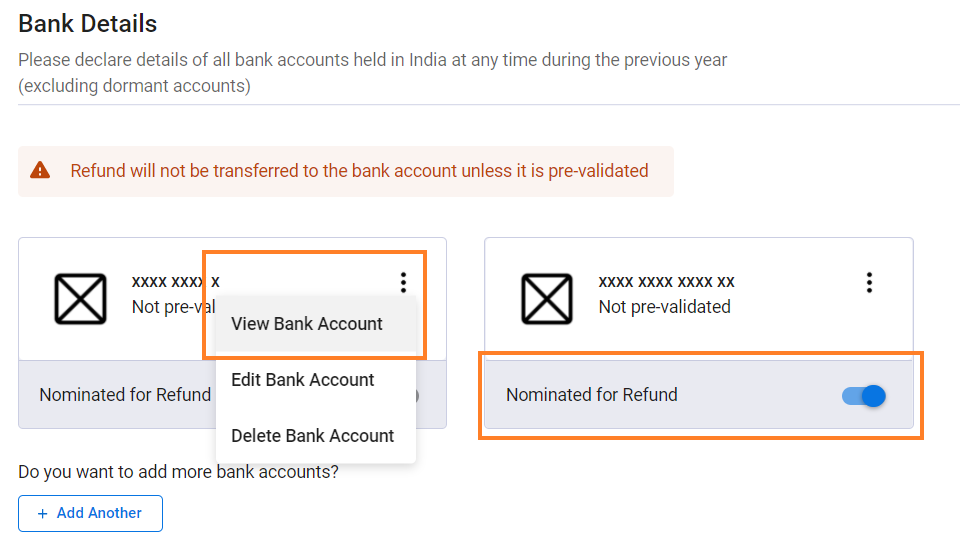
Note: My further steps follow based on not selecting ‘No‘ to choosing a new tax regime. - Bank Details – Add your bank details if you don’t have any. If you already linked your bank account before, you need to re-validate it again.
If you have linked multiple banks, select the one that you nominated for return.
Once you verified the above 6 items, you need to confirm the personal information section by clicking on the Confirm button at the bottom.
Step 12: Confirm Gross Total Income Section
Come to the Gross Total Income section on the Return Summary page, click on the Gross total income section open the new page where you can find the income source details.
The income details have pre-filled from your Form 16. You can edit the details if anything wants to change or add new.
Click on the Edit button to edit the Income from Salary details like Gross Salary, Allowance Exemption, etc.

Ensure the following by comparing your Form 16 that got from your employer.
- Gross Salary Amount
- Less Exempt Allowance – You can add/remove/update the allowance from the allowance section.
- Deduction under section 16 – following 2 deductions could be considered by your employer, so make sure this amount deduction present in your Form 16 and here.
– Standard deduction u/s 16(ia)
– Professional tax u/s 16(iii)
Note: Sec 10 (13A) Allowance needs to be selected if you want to add House Rent exemption. Refer to the following screen.
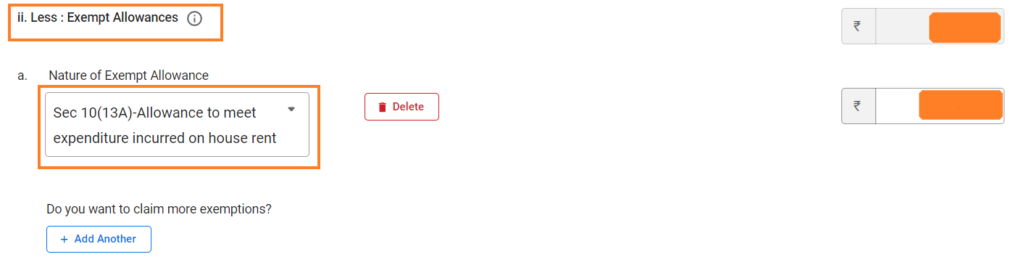
You can add other sources of income using the section Income from House Property and Income from other sources.
Then click on Confirm button at bottom of Verify your income source details page.
Step 13: Confirm Total Deductions Section
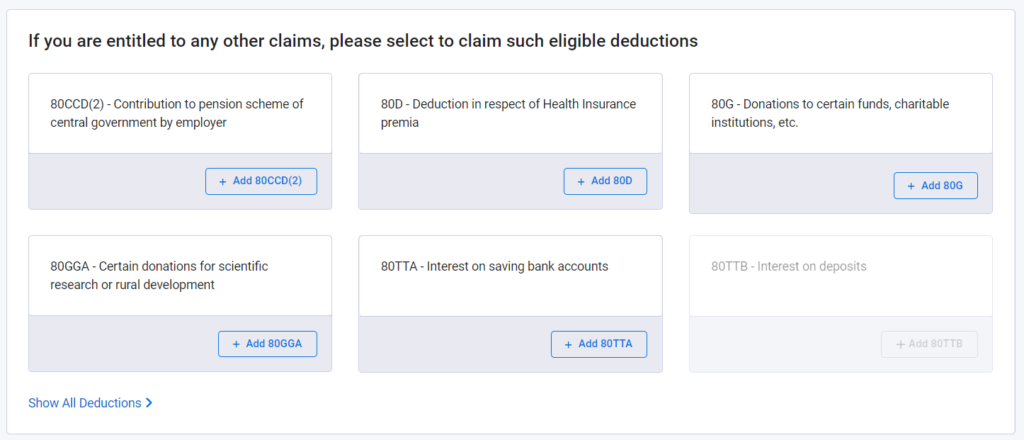
Explore this section by clicking on it. The deduction page will open, you can see the eligible cases to apply for deductions.

You should provide yes/no to the eligible deductions, read the deduction eligibilities carefully, and before updating it.
Common Types of deduction eligibilities,
- Donation Paid – Donation Paid to Trust, Govt Care fund, etc. Required Doner PAN info
- Deduction under section 80GG – If your employer doesn’t provide a house rent allowance, you can use this section to claim the deduction.
- Deduction under section 80C – You can mention Term Insurance, LIC, ELSS, PPF, and 5-Year FD. Maximum deduction eligibility 1,50,000
- Deduction under section 80CCD(2)
- Deduction under section 80D – Medical Insurance for you and your parents. Heath Check-up for you and your parents – Max 5000
- Deduction under section 80E – Interest on Loan like Housing Loans
- Other Deduction
After updated the eligible deduction, click on the Continue button. This will lead you to Verify your deduction page where you can verify the deduction given and have the option to add 80D, 80G section, etc (only shown if you selected yes in the deduction section.)
For example, if you have given Yes for claim under donation, you must Add the detail in the 80G section for heath insurances and medical expenses. Same for 80D donation-related.
Once added all eligible deductions, then click on Confirm button at bottom of Verify your deductions page.
Step 14: Verify Tax Paid Details
In this section, you can see the tax you already paid that is TDS (Tax Deducted at Source) on Salary income,
If you have paid tax of other incomes, those details are also shown here. You can find the aggregated amount of Tax Paid.

You need to confirm the tax paid details after verified by clicking on Confirm button at bottom of verifying your taxes paid details page.
Step 15: Confirm Total Tax Liability
This is your last section to confirm, verify your tax liability details. This section shows the following details to verify based on the details you updated in the income and deduction section.
- Gross Total Income,
- Total Deductions
- Total Income = Gross Total Income – Total Deductions
- Computation of Tax on Total Income
- Total CESS
- Total Tax
Once verified above details, confirm the tax liability details by clicking on Confirm button at bottom of verifying your taxes liability details page.
Step 16: Proceed on Return Summary
After you have done the verification on the above 5 sections, you can see the Confirmed Message on each.

Step 17: Confirm on Return Summary
Proceeding from the above step shows the refund verification page.
Refund = Tax Paid – Total Tax Liability.
If you have paid extra tax, that extra amount will be refunded.
If Tax Paid is lesser than the Tax Liability, you need to pay the balance tax amount.

After confirming your return summary -> Confirm your return summary by providing your declaration -> Then Verify and Submit the Income Tax Return.
I hope i have included all the steps involved to file income tax return in newly launched e-filing portal. This steps will be really helpful for salaried professional employees who wants to file income tax return but have difficulties while using this and understanding the ITR form.