
CSR stands for Certificate Signing Request. CSR must be submitted while generating an SSL certificate from any certificate authority. Therefore, creating CSR is an important one to know for a web developer who is managing their website hosting and SSL Certificate. In this article, I will walk through the steps to create the CSR in IIS Windows Server.
Steps to create a CSR file
Step 1: Open the IIS Manager in the Windows server. In the left pane, open root navigation. You can double-click on the root item to open it. Then you will find “Server Certificates” in the right pane.

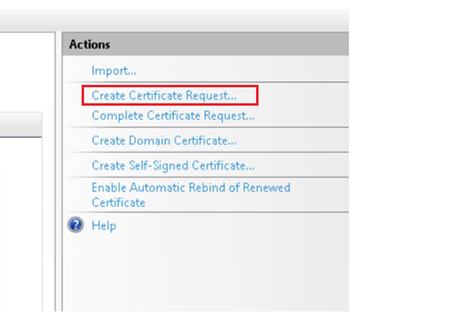
Step 2: Open “Server Certificates” by double click on it. You can find the Actions pane on the right side. Click on “Create Certificate Request” in Actions Pane.
Step 3: New dialog will open where you need to fill in the following details.
- Common Name – This should be the root domain to which you are looking to apply SSL certificate. Example, if you are applying SSL certificate for the domain “testdomain.com”, you must give the same name in common name field. If you are applying SSL certificate for wildcard domain “*.testdomain.com”, use full wildcard name like “*.testdomain.com”.
- Organization – Your organization name or make it individual if you’re not belong to any organization.
- Organizational Unit – It will be the unit like IT, Banking, E-commerce etc where your organization belongs to.
- City/Locality
- State/Province
- Country/Region

Click on the Next button once filled above details.
Step 4: Provide the Cryptographic service provider and Bit length.
The cryptographic service provider will be “Microsoft RSA SChannel Cryptographic Provider” and the bit length can be 2048 or above. Higher the bit length more complex and secure the certificate, however, a higher number will slow down the website performance. Hence bit length 2048 would be ideal here.

Click on the Next button.
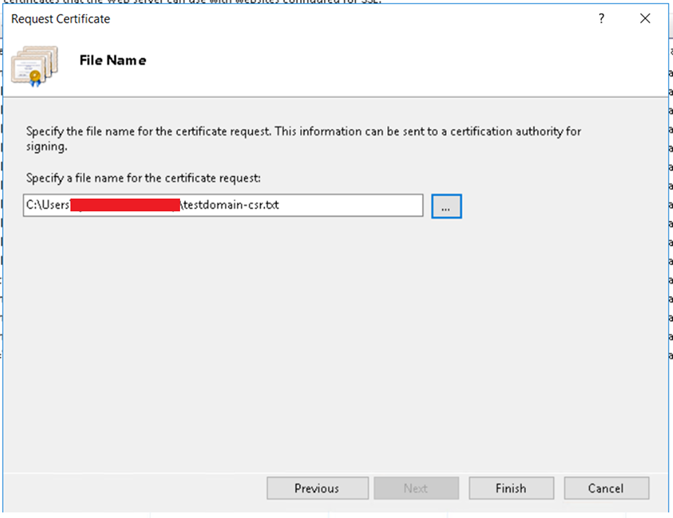
Step 5: Select the file location where you want to save the CSR file. CSR file will be generated in TXT format. Then click on the Finish button.
Step 6: That’s it. CSR file will be generated in a few seconds in the location you have given in the above step. While you open the txt file, you will find the CSR in the following format,
—–BEGIN NEW CERTIFICATE REQUEST—–
…………………
…………………
—–END NEW CERTIFICATE REQUEST—–
You can copy the complete content and use it to apply a new SSL certificate new or SSL certificate renewal process.
Check the following article to complete the certificate request in IIS once you got the certificate files from Certificate Authority.


One thought on “How to Create a CSR file in the IIS Windows Server?”